Original address:http://fishpepper.de/2017/06/18/ ... dable-and-powerful/

I have used a variety of different soldering irons over the years. I started with a simple, fixed temperature iron during my childhood days to burn wholes in my mom’s carpet and came across different soldering iron brands the last years. I used them for heavy duty stuff such as soldering Li-Ion cells, delicate fine pitched SMD stuff, accidentally burning holes in furniture, and of course testing the temperature resistance of my skin. Some years ago I was annoyed by the different cheap irons I had used and bought a digital Ersa RDS 80W. It did what it was supposed to do and with the proper (thick) tips I was able to get good and fast heat transfer to Li-Ion cells as well. I was always a bit disappointed by the performance with small tips. So I got used to use the 4mm tip for fine pitch SMD assembly. I often see people giving the advice to ramp up the temperature to 475°C or more in order to solder heavy duty wires or multilayer PDBs. NO, DO NOT DO THIS! This will probably melt connectors or destroy the PCB. My advice in the past was to use bigger tips for better heat transfer. When we got the JBC soldering irons at work I was stunned. Their special feature is that they have the heating element plus sensor directly in the front of the tip. They heat up (almost) instantaneously and the heat transfer is incredible. You can use the finest tip to desolder wired components from a multilayer PCB. Thanks to the special tip construction the soldering station measures the temperature exactly where you solder and can keep up the temperature at the right level. It was clear that I needed to have that at home as well. Well… Check the price point of those JBC stations. No way that I can justify spending the whole holiday money on such a (useless) toy. So I started to look for alternatives. And I found it! Hakko sells soldering irons using the “T12” tip system. Those tips are similar to the ones found on JBC, direct measurement and powerful heating directly at the tip. It’s getting even better: As such a soldering station is not that complicated to build, all you need is a sensor, a heating element and some kind of PID controller to regulate the temperature, there are some cheap stm32 based soldering controllers you can buy in china. They come with a T12 compatible soldering tip holder and when I say cheap, I really mean cheap: The whole set of my OLED soldering controller was $52 + import tax. About one third of what I paid for my old Ersa station… If you do not need the fancy OLED screen you can go even cheaper, a similar LED version sells for $42 on banggood. And the best thing: T12 soldering tips come in all shapes and sizes and are dirt cheap as well ($2-4)! In addition I bought the following soldering tips: You might be asking why do you need that many? Well, I had no idea on how well they perform so I ordered a whole set: - T12-ILS: for heavy duty stuff, soldering multiplayer PDBs or Li-Ion cell tabs
- T12-D24: cabling, e.g. soldering XT60 connectors
- T12-D16: good multi use tool, I use it for fine pitch SMD and cabling works
- T12-BC1: very fine pitched SMD stuff
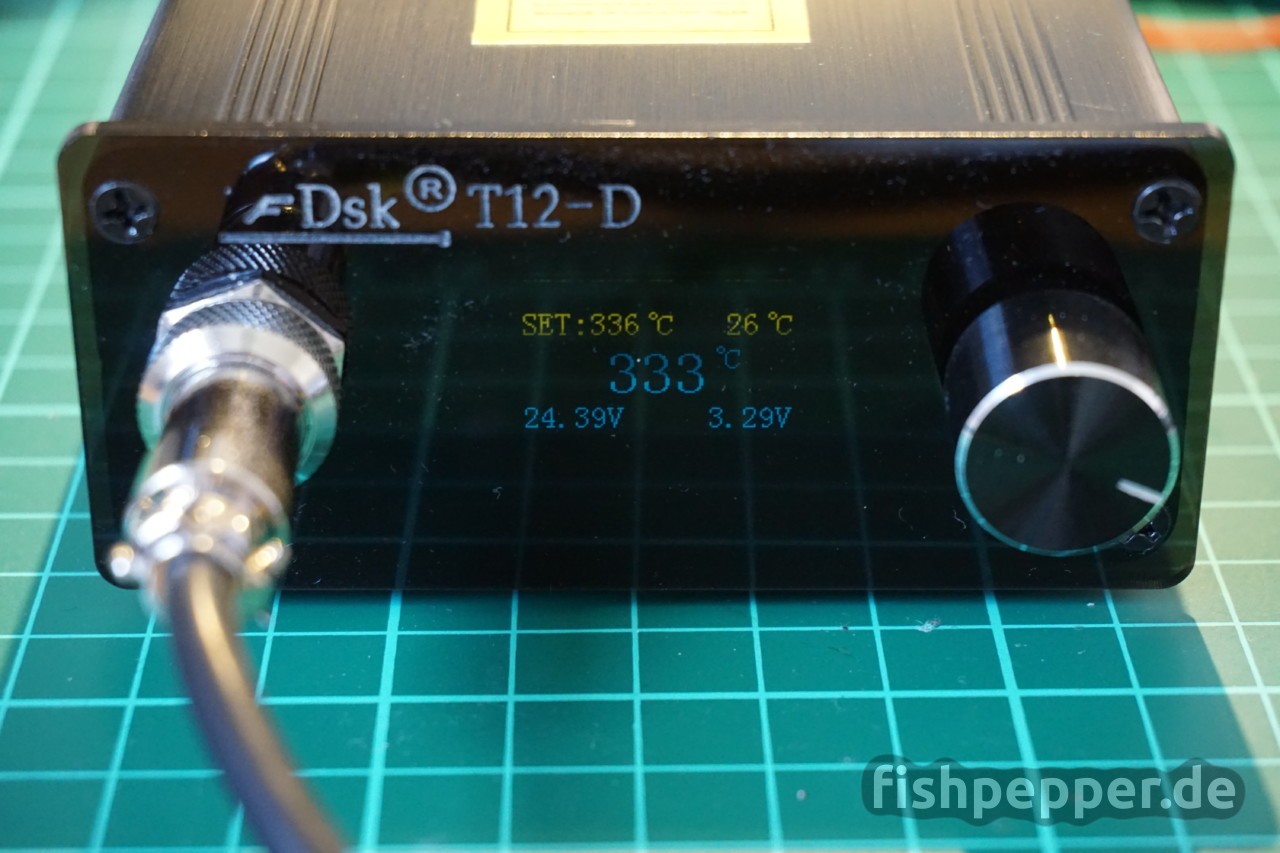
The station comes in a nice aluminum extruded case and the cable to the tip is very flexible. But be careful, the station is sold with different kinds of tip holders, not all might feature this flexible cable. Let’s have a look at the user interface:  The station comes with a nice and bright graphical OLED screen. The right knob is a encoder with a pushbutton, you can rotate it 360° and use the button to click. The interface is quite simple, use the knob to set the target temperature (shown in the upper left corner) and there you go. You can see the case temperature (upper right corner), the power supply voltage (lower left), the supply voltage (lower left), and the lower right shows the current power consumption. The big center letters show the current tip temperature. A long button press enters a menu where you can set some default values. The station comes with a neat tip saving feature: There is a motion sensor inside the handle and after some time of no use the station will power down to a predefined storage/idle temperature. Once you pick up the handle it powers up again and you are at soldering temperature within some seconds — really neat! Wait, that sounds to good to be true, right? Where is the catch? As you can see I used the station the last months a lot. Everything was fine… I was using the power cable from my laptop charger to power the station, it used the same mini 3-pin AC connector (ground, live and protective conductor): I was blown away by the performance. I used the D16 tip the most, from fine pitched stuff to heavy duty stuff. Quick heat up within seconds, no problems with multilayer PDBs and perfect temperature control. You can even swap the tips while they are hot! The lower end that inserts into the hand tool stays cool enough to be swapped by hand — amazing! But then we moved to a new apartment… I was soldering the tinyPEPPER2S esc end got some bad FETs. I swapped them and all was fine. I was wondering how I damaged them, I took ESD precautions and there was no static electricity around — at least I though so.
When working on my tinyOSD prototype the last days I had some strange issues with the stm32, some analog circuits did not behave as it should after some soldering rework. Then, while soldering again, I was shocked, with nothing connected to the circuit, the red status led started to light up once I touched the PCB with the soldering iron! — what the heck?! I took my multimeter and got surprised by a (high impedance) 130V AC voltage on the soldering tip — wait, this should be grounded via the protective conductor, right? I checked everything inside the soldering controller. Looks good, a stable connection from protective ground to the tip (0.6Ohm). Then I realized that I had swapped the power cable during the move. I took it apart and what I saw was really shocking: So this is a three (!) pole mains cable: Neutral, Phase, and Protective ground — Do you spot the failure?
Beside from the minimal wire gauge of 0.2mm² or less, which is supposed to be 1.5mm², there are only two conductors! They saved some bucks by optimizing the third “unnecessary” cable away. I was shocked… I did not expect this to happen. You might say you get what you pay for — and you might be right. But I can not see why one should sell stuff with those dangerously “optimized” cables when the rest of the station is really really nice. So would I buy it again? Yes, definitely! This is the best soldering station I have been working with at home. It outperforms by Ersa station a hundred times. Sure, the JBC at work is a bit better but it costs more than ten times what I paid for this. Just make sure to check the mains cable and in case the shield is missing make sure to ditch it and buy a proper cable! And now enjoy hassle free soldering! | 


 发表于 2017-12-19 09:51:19